Apache NiFi - Authentication with OpenID Connect
The latest release of Apache NiFi (1.4.0) adds the ability to authenticate users via the OpenID Connect protocol. According to https://openid.net/connect:
“OpenID Connect 1.0 is a simple identity layer on top of the OAuth 2.0 protocol. It allows Clients to verify the identity of the End-User based on the authentication performed by an Authorization Server, as well as to obtain basic profile information about the End-User in an interoperable and REST-like manner.”
At a high-level, this lets NiFi delegate the authentication responsibilities to an external identity provider that is OpenID Connect compatible. Your organization might choose to run your own identity server, or you might leverage one of the public providers.
The cool part is that Google’s OAuth 2.0 APIs comply with OpenID Connect, so you can configure NiFi to login with your Google account. Let’s look at how to set that up…
Create Google API Credentials
-
Login to the Google Developers Console with your Google account:
-
Choose the “Select Project” option from the top menu:

-
Click the + icon to create a new project:

-
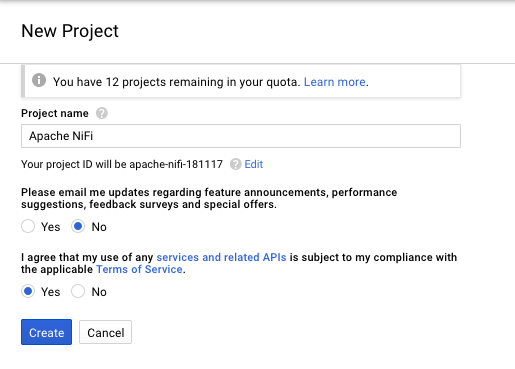
Provide a name for the project and accept the terms:
-
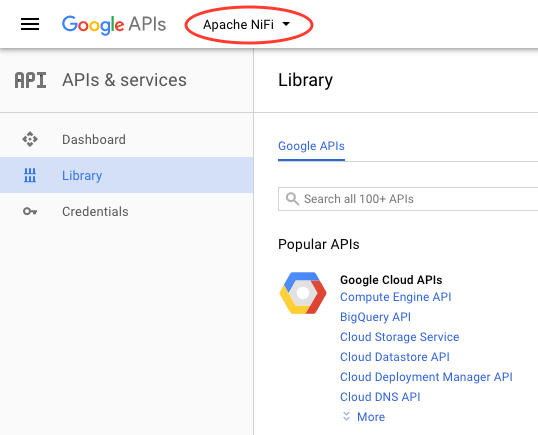
Select the project you just created from the top-menu:
-
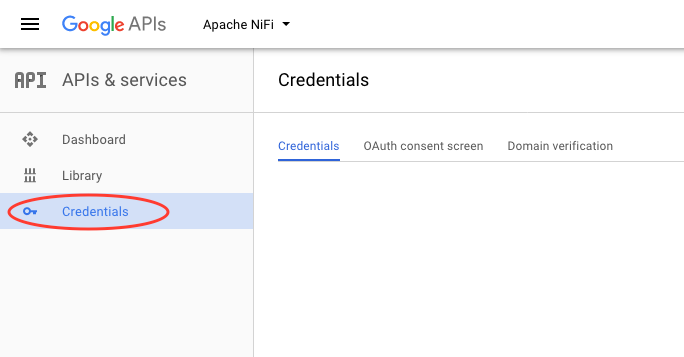
Select the “Credentials” menu on the left side:
-
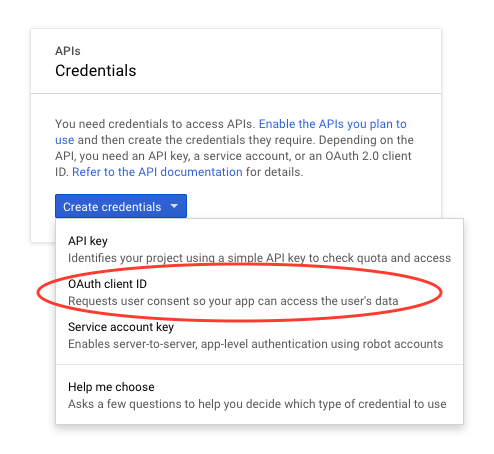
Create new credentials and select “OAuth client ID”:
-
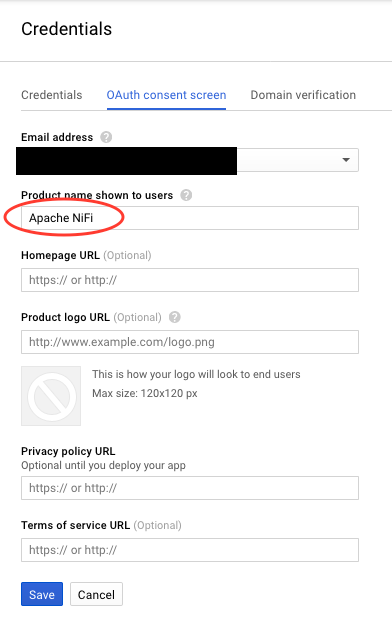
Follow the prompt to set a display name for the OAuth consent screen:
-
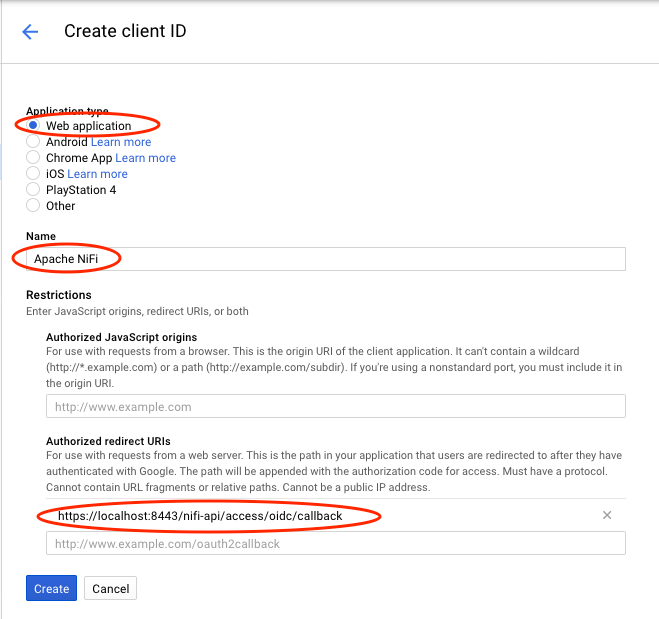
Select the type as “Web application”, enter a name, and provide the callback URL that Google should redirect to after authenticating a user:
-
At this point there should be a pop-up screen with a “client ID” and “client secret”, copy those somewhere for later.
You can always come back to the credentials list and click on the specific credential and then get the client id and secret from the credential page.
Configure NiFi
In order to perform any type of authentication to NiFi, you need to configure the NiFi server with a truststore and keystore. This part is going to assume that you already have those, or you know how to generate them. There are plenty of good tutorials out there that already cover this topic.
-
Configure TLS/SSL properties in nifi.properties:
nifi.remote.input.secure=true nifi.web.https.port=8443 nifi.security.keystore= nifi.security.keystoreType= nifi.security.keystorePasswd= nifi.security.keyPasswd= nifi.security.truststore= nifi.security.truststoreType= nifi.security.truststorePasswd= -
Configure the OpenID Connect properties in nifi.properties:
nifi.security.user.oidc.discovery.url=https://accounts.google.com/.well-known/openid-configuration
nifi.security.user.oidc.connect.timeout=5 secs
nifi.security.user.oidc.read.timeout=5 secs
nifi.security.user.oidc.client.id=<YOUR-CLIENT-ID>
nifi.security.user.oidc.client.secret=<YOUR-CLIENT-SECRET>
nifi.security.user.oidc.preferred.jwsalgorithm=
Replacing the client id and client secret with the values from your Google credentials in the previous section.
-
Configure authorizers.xml so that your Google account is the initial admin:
<userGroupProvider>
  <identifier>file-user-group-provider</identifier>
  <class>org.apache.nifi.authorization.FileUserGroupProvider</class>
  <property name="Users File">./conf/users.xml</property>
  <property name="Legacy Authorized Users File"></property>

  <property name="Initial User Identity 1">[email protected]</property>
</userGroupProvider>

<accessPolicyProvider>
  <identifier>file-access-policy-provider</identifier>
  <class>org.apache.nifi.authorization.FileAccessPolicyProvider</class>
  <property name="User Group Provider">file-user-group-provider</property>
  <property name="Authorizations File">./conf/authorizations.xml</property>
  <property name="Initial Admin Identity">[email protected]</property>
  <property name="Legacy Authorized Users File"></property>

  <property name="Node Identity 1"></property>
</accessPolicyProvider>
NOTE: The above shows the new style of authorizer configuration, if you are using the old style then there will be only one field where the initial admin is entered.
-
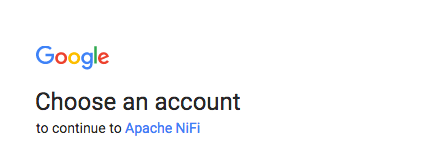
Start NiFi and navigate to https://localhost:8443/nifi, you should be redirected to the familiar Google login page:
-
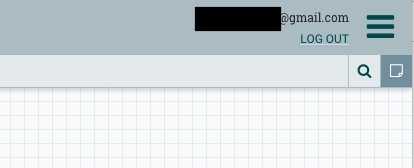
After entering your Google credentials you should be successfully logged in to NiFi with your Google account!
blog comments powered by Disqus