Apache NiFi 1.18.0 - Using the HashiCorp Vault Parameter Provider
(Guest author: Joe Gresock)
This post walks through setting up HashiCorp Vault Key/Value Secrets for use with the HashiCorpVaultParameterProvider in Apache NiFi 1.18.0.
Introduction
In a previous post, we walked through protecting NiFi configuration properties using HashiCorp Vault’s Key/Value Secrets Engine. Now with Apache NiFi 1.18.0, we can now derive Parameter Contexts from HashiCorp Vault Key/Value secrets using the new HashiCorp Vault Parameter Provider.
Setup
To get started, we’ll need to download and install HashiCorp Vault and NiFi 1.18.0.
- First, follow the relevant Vault installation guide for your system: https://www.vaultproject.io/downloads
- Then head over to the Apache nifi downloads page: https://nifi.apache.org/download.html
- Download
nifi-toolkit-1.18.0-bin.zip
- Download
Unzip nifi-1.18.0-bin.zip in the same parent directory, and then start NiFi:
unzip nifi-1.18.0-bin.zip
cd nifi-1.18.0
./bin/nifi.sh start
We’ll start Vault using development mode, which allows us to easily interact with the Vault server without having to unseal the server. Run the following:
vault server -dev > init.log
This will launch Vault in development mode, and will write something like the following to init.log:
WARNING! dev mode is enabled! In this mode, Vault runs entirely in-memory
and starts unsealed with a single unseal key. The root token is already
authenticated to the CLI, so you can immediately begin using Vault.

You may need to set the following environment variable:

    $ export VAULT_ADDR='http://127.0.0.1:8200'

The unseal key and root token are displayed below in case you want to
seal/unseal the Vault or re-authenticate.

Unseal Key: fUJ6zxqlo+vsWFlCxMK9MKrhgpsmxdNla727mu+5nuY=
Root Token: s.3qsioJdA3YXptvEQURDCijUw

Development mode should NOT be used in production installations!
In another terminal, create a file containing this root token, which we’ll use later:
TOKEN=$(grep "Root Token" init.log | cut -d ":" -f2 | xargs)
echo "vault.token=$TOKEN" > /tmp/nifi-vault.properties
echo "vault.uri=http://localhost:8200" >> /tmp/nifi-vault.properties
Run the following to enable the K/V (version 1) Secrets Engine, which actually stores sensitive values in the Vault server:
vault secrets enable kv
Here the Vault path for this secrets engine will be kv. We will see this used later in our NiFi configuration. If we had wanted to
use a different Vault path, for example, nifi-kv, we could have used the command vault secrets enable -path nifi-kv kv.
Configuring HashiCorp Vault Parameter Provider and Controller Service
Now that we have Vault running and configured, we’ll add a Parameter Provider in NiFi to connect to our Vault instance.
First, visit NiFi’s UI: https://localhost:8443/nifi. Copy the generated username and password from logs/nifi-app.log in order to log in.
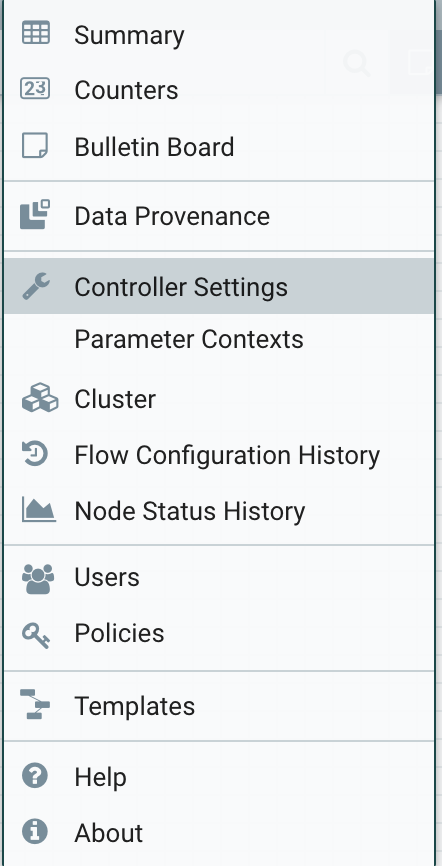
Then, select Controller Settings from the top-right hamburger menu in NiFi:
Then go to the Parameter Providers tab and click the ‘+’ button to add a new provider. Select HashiCorpVaultParameterProvider and then ‘Add’:

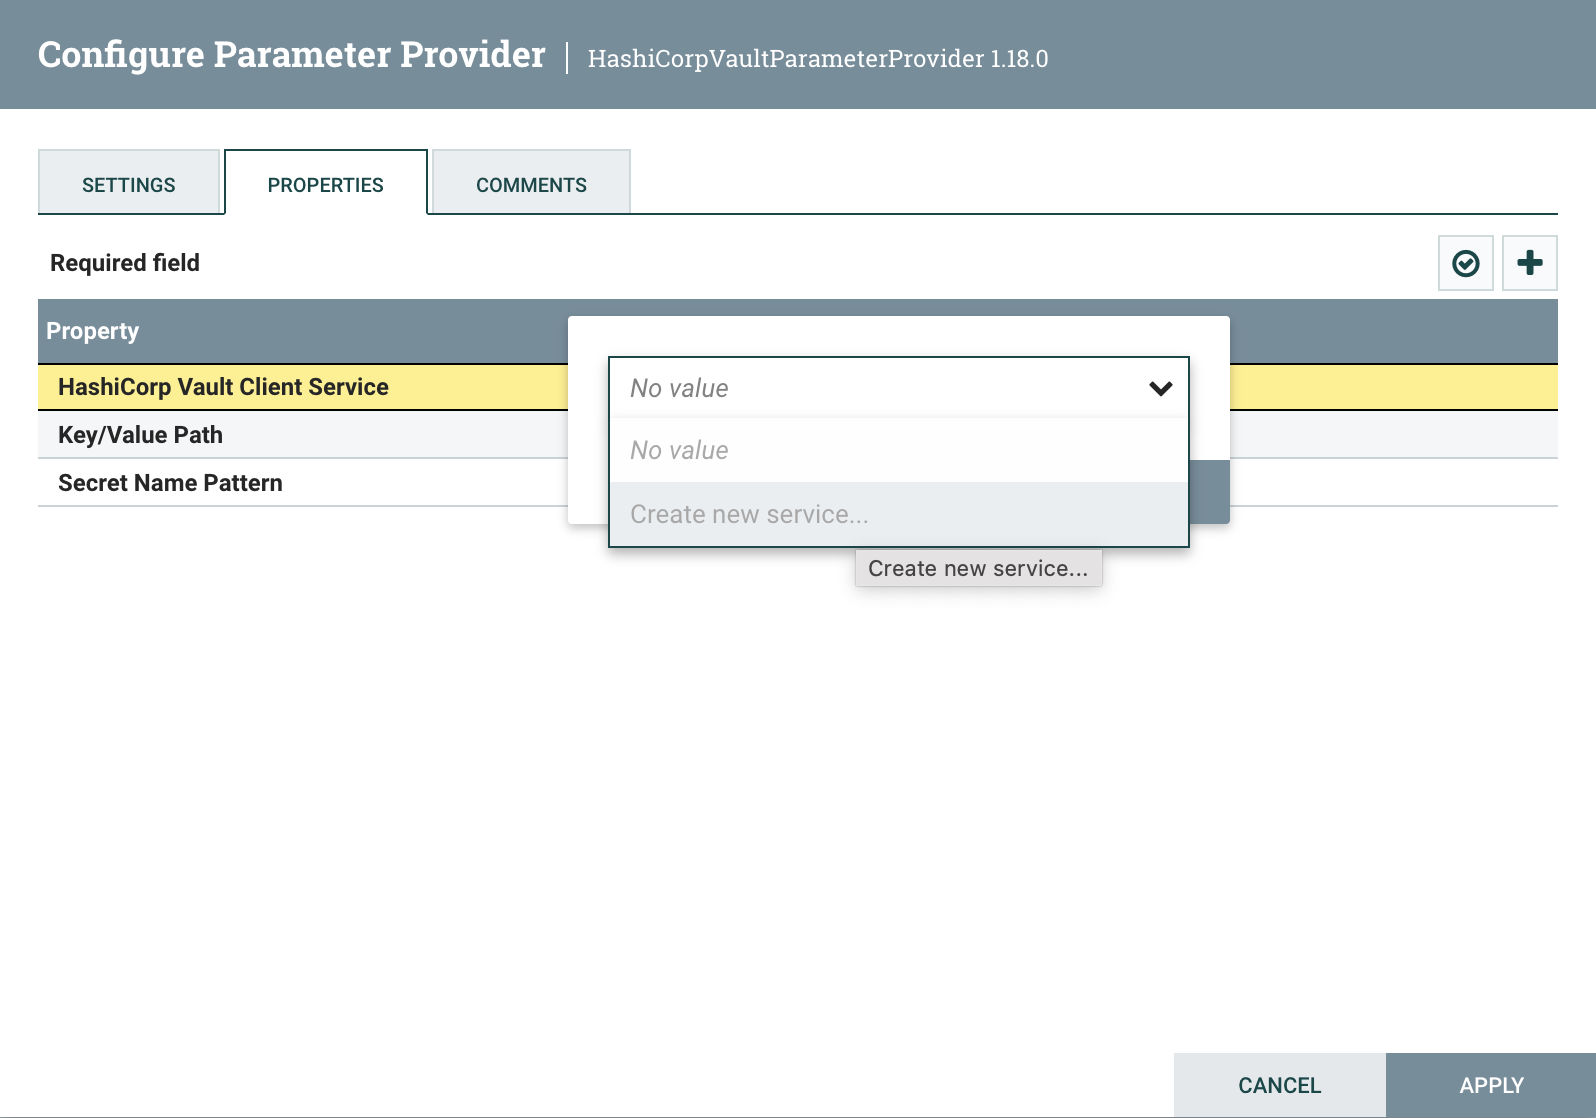
Click the pencil icon to edit the provider, and then go to the ‘Properties’ tab. In the ‘HashiCorp Vault Client Service’ property, create a new controller service:
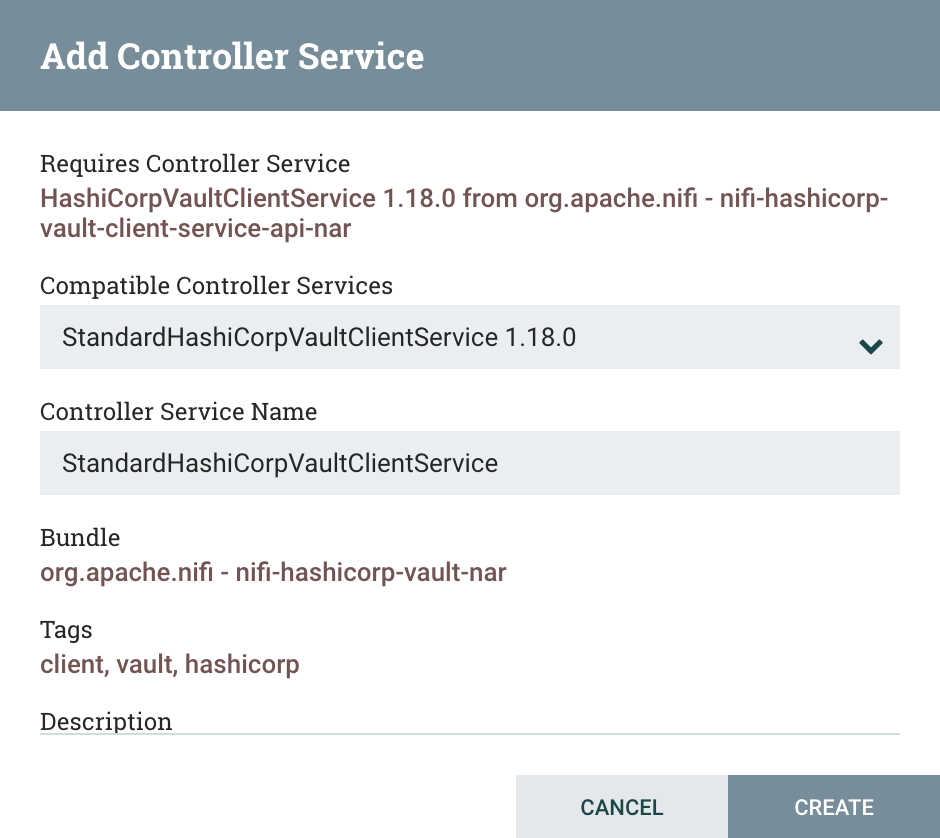
Click the ‘Create’ button:
Click the right arrow button to go to the new service, and say ‘Yes’ to save the changes so far. Configure the controller service and then go to the Properties tab.
We can test out a couple different configurations easily by using the Configuration Verification button.
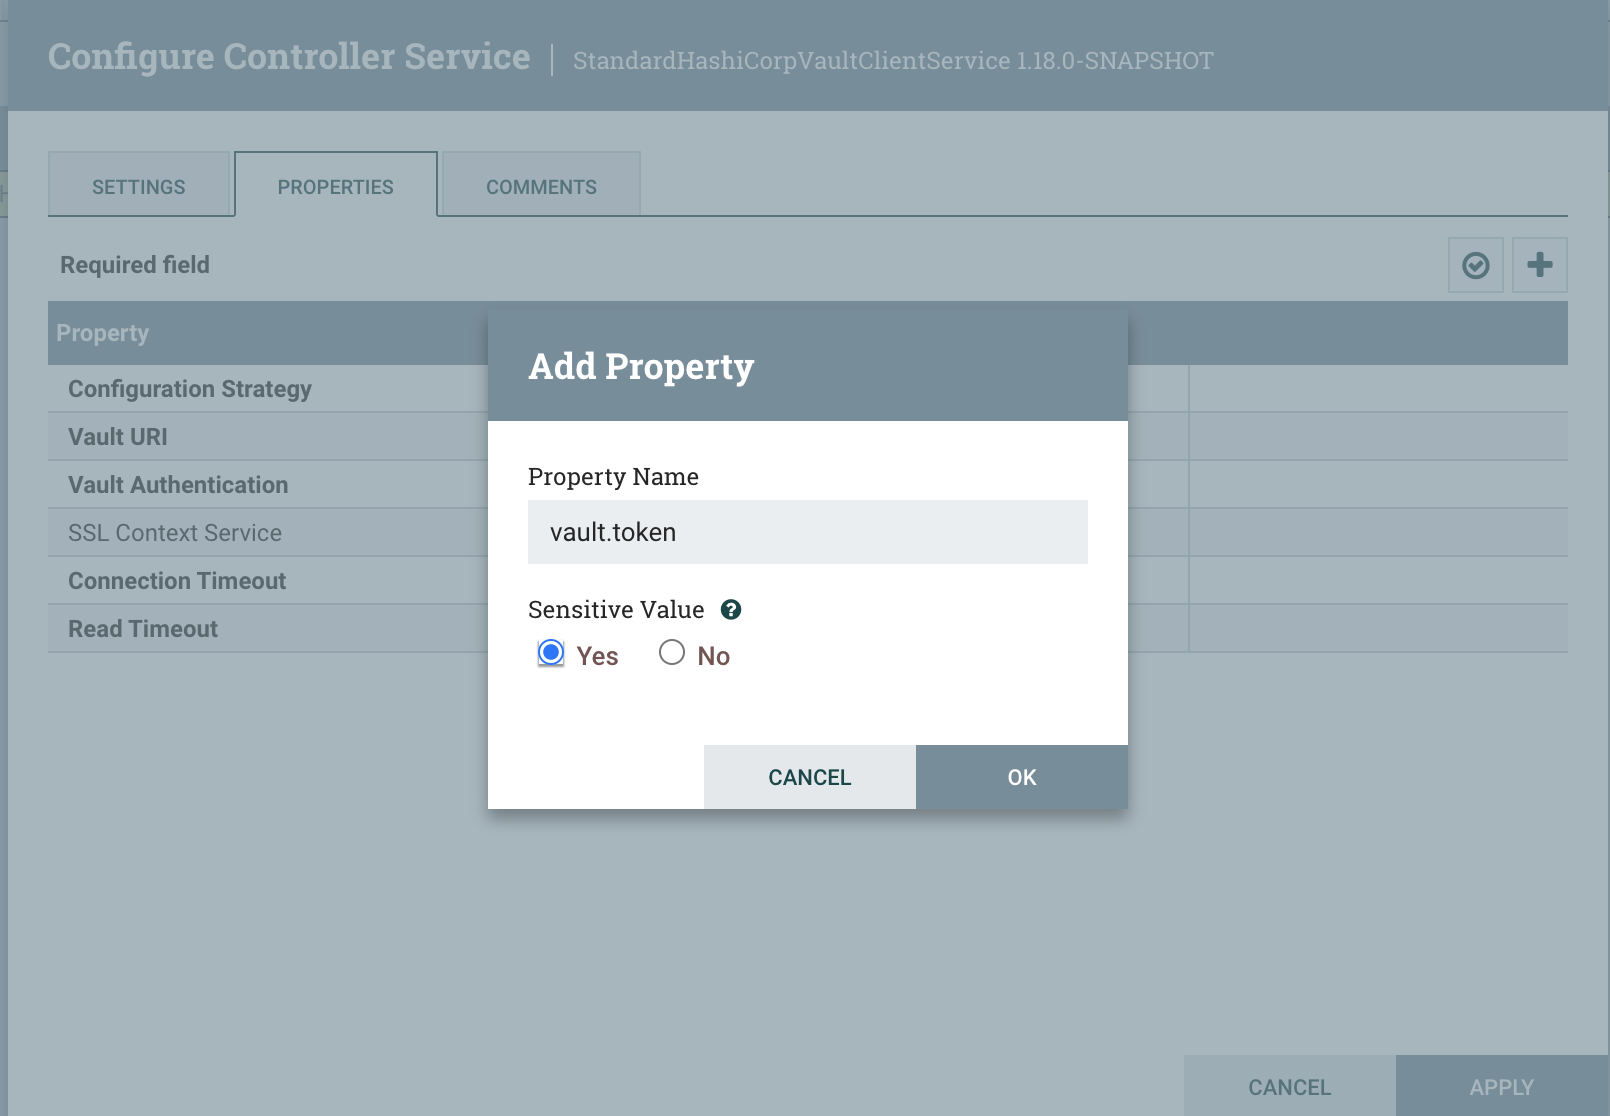
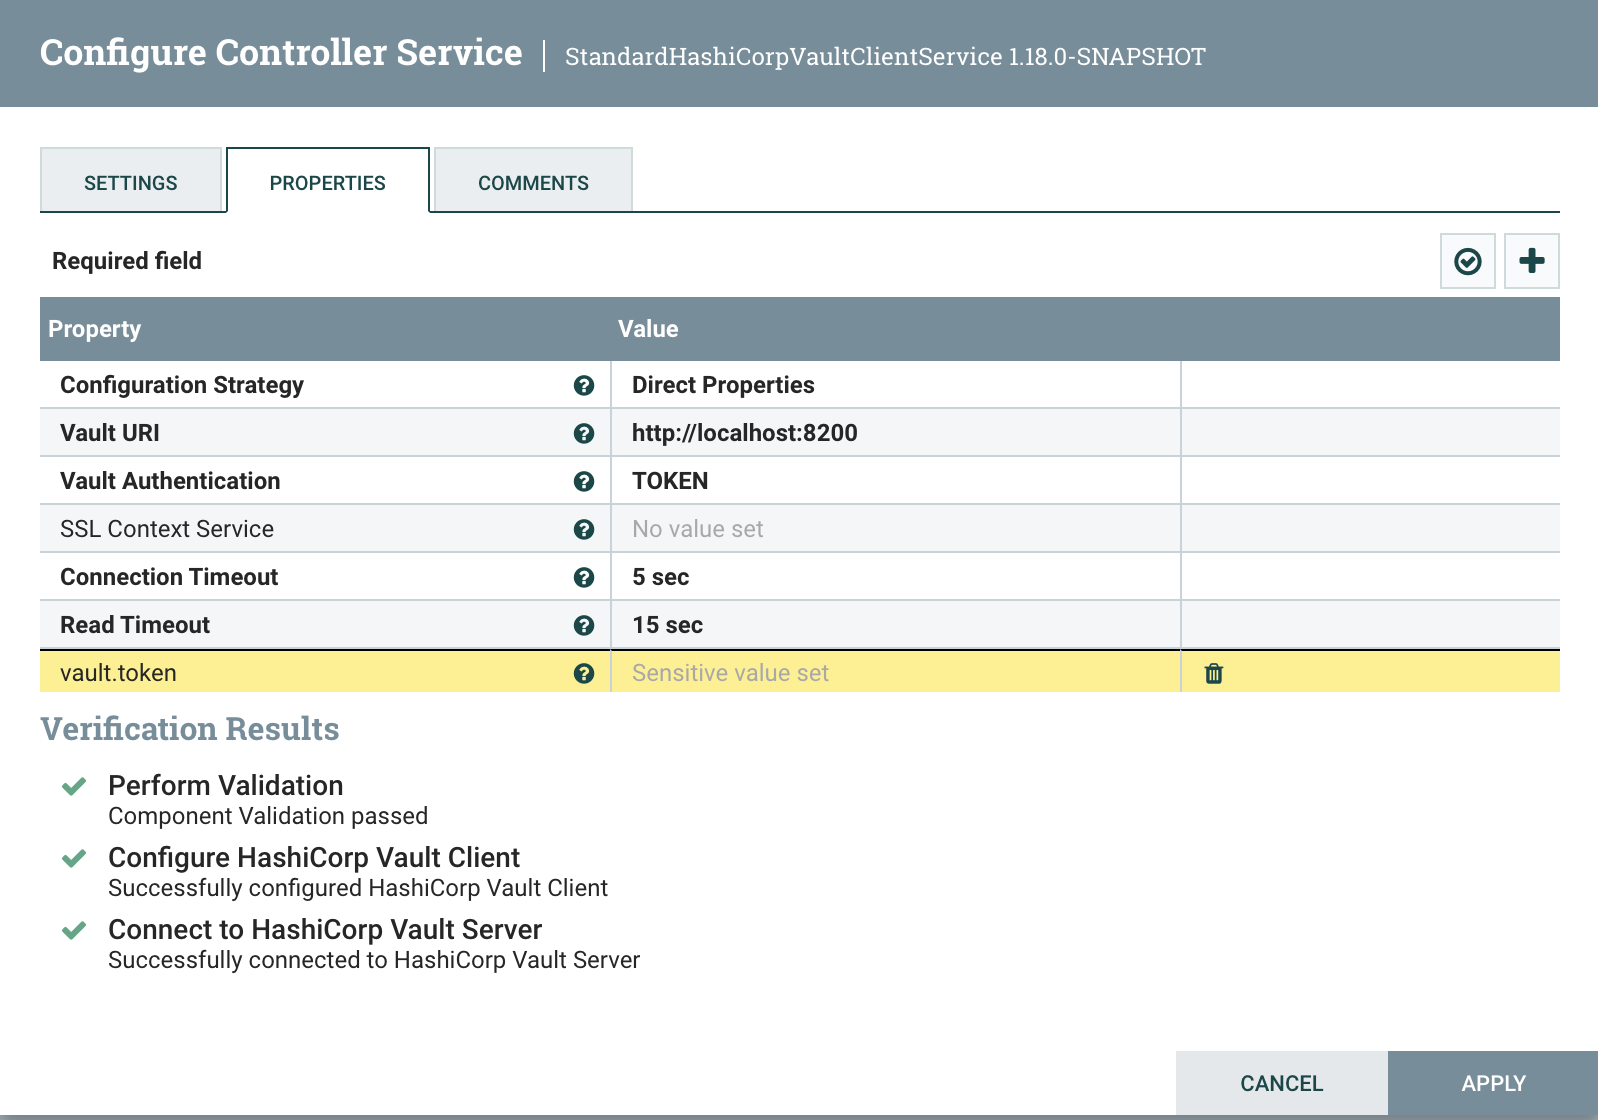
First, we’ll use the ‘Direct Properties’ configuration strategy, entering our configuration directly in the service. To do this, set
the Vault URI to http://localhost:8200. Then add a new dynamic property named vault.token, specifying ‘Yes’ to indicate it is a sensitive property:
For the value, paste in the Root Token from the Vault installation above. At this point, you can verify the configuration with the check mark button:
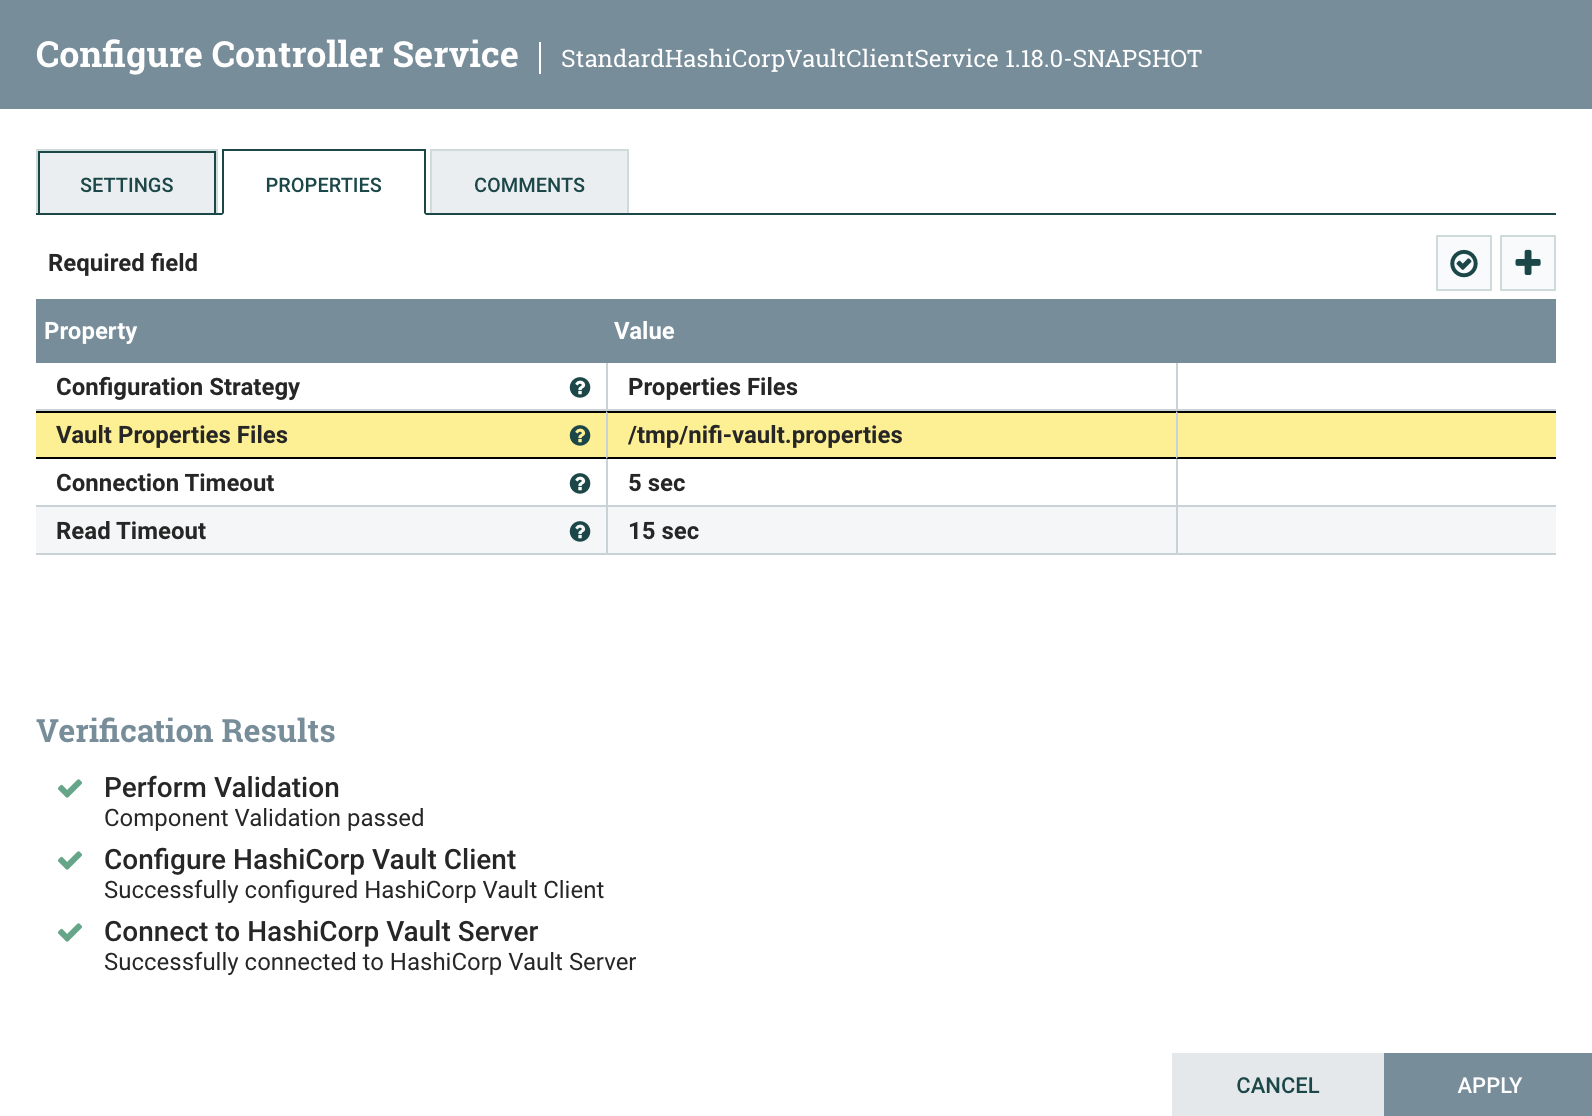
This demonstrates that we can connect to Vault! To demonstrate the other configuration strategy, switch the Configuration Strategy value to
Properties Files. Then set ‘Vault Properties Files’ to /tmp/nifi-vault.properties. Notice from above that we had specified the
vault.token and vault.uri properties in this properties file. These properties are named after the Spring Data Vault configuration property keys.
Any of the property keys described in this section) of the Spring documentation can be used in this properties file.
Here it would also be good to note that if you already have the
HashiCorp Vault sensitive properties provider integrated and
wish to use the same Vault instance, you can specify a ‘Vault Properties Files’ value of ./conf/bootstrap-hashicorp-vault.conf. Note that if you are using
the vault.authentication.properties.file property in this bootsrap configuration in order to reference another properties file that contains your
Vault authentication properties, you will also need to list this in the ‘Vault Properties Files’ (e.g., ./conf/bootstrap-hashicorp-vault.conf, /path/to/vault-auth.properties). See the StandardHashiCoprVaultClientService usage documentation Additional Details section for further information regarding configuration
of this service.
Now run the verification again, and we should still be able to connect to Vault:
Apply the changes, and then click the lightning bolt button to enable the service:
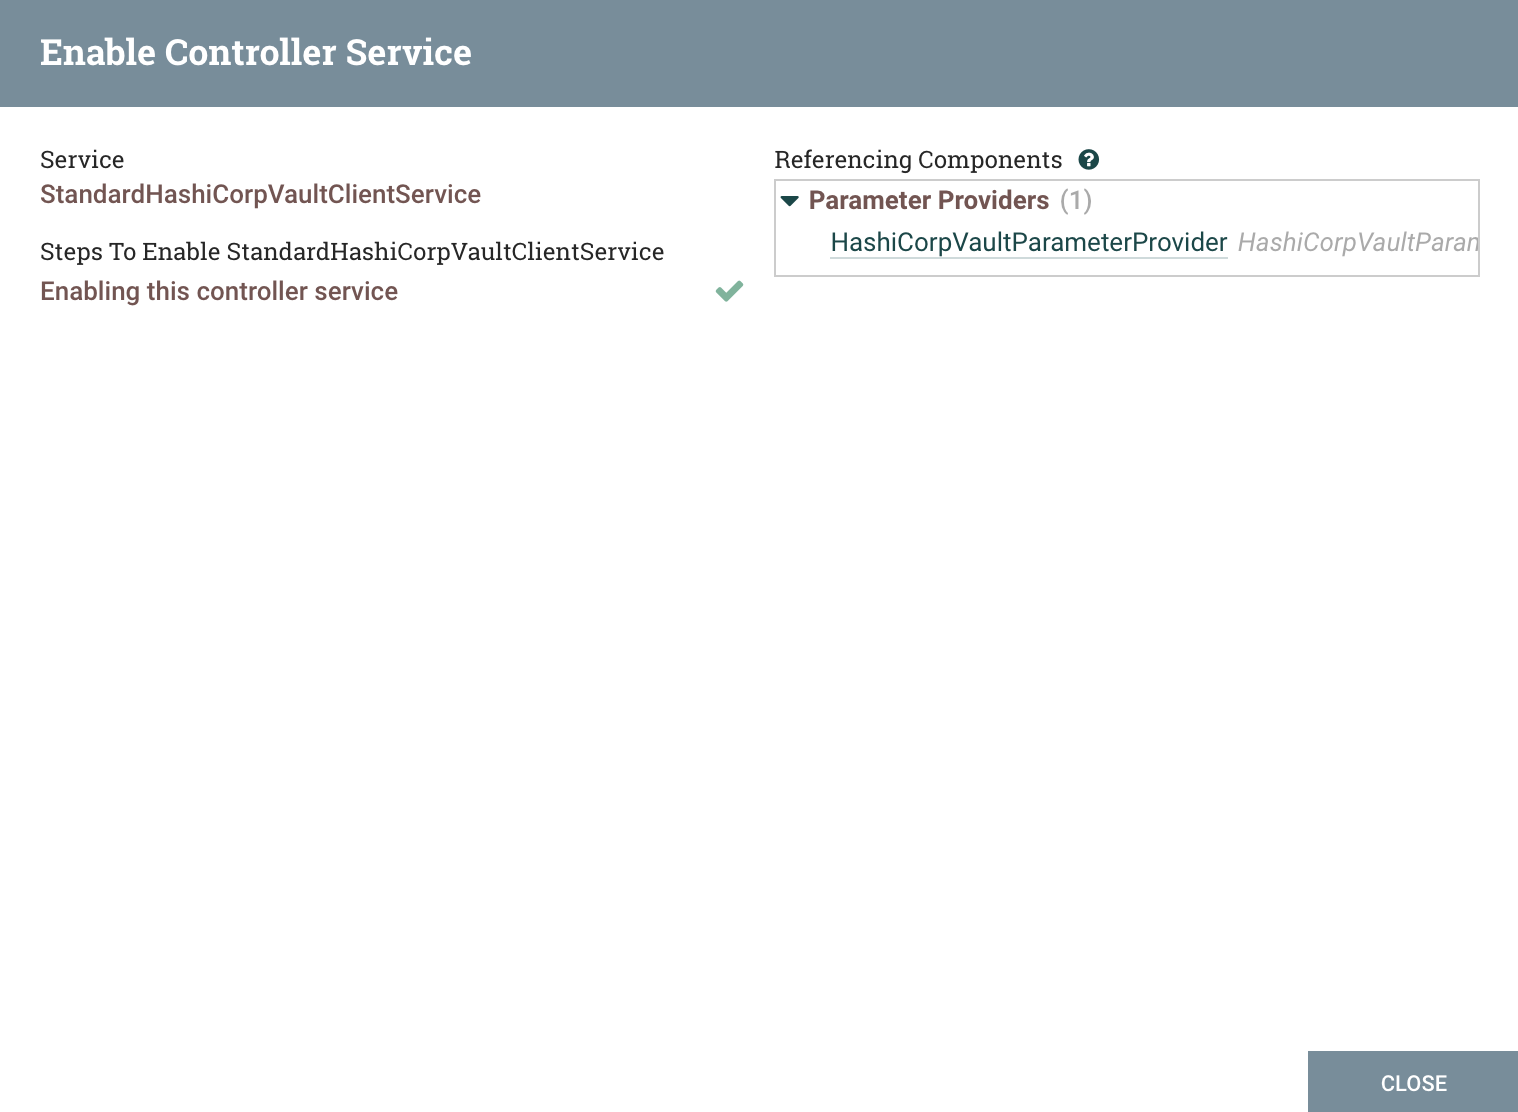
Close this dialog and then return to the Parameter Providers tab. Edit the provider so we can inspect its other
properties. Notice that the ‘Key/Value Path’ defaults to kv, which is the same path we used above when enabling the secrets engine in Vault.
This is where you would change the path if you used a different one. Also notice the ‘Secret Name Pattern’ property. This allows us to
limit which secrets in this Vault path are pulled in as parameters, which can be useful if more than just the ones we want are present. To demonstrate
this in action, set this pattern to VaultContext.*, allowing us to select only secrets whose names start with ‘VaultContext’.
Click ‘Apply’.
Adding Vault secrets
Now we need to actually create some secrets to pull in as parameters. Back in the command line, run the following commands in the same
terminal where you set the $TOKEN variable:
export VAULT_TOKEN=$TOKEN
export VAULT_URI=http://localhost:8200

vault kv put kv/VaultContext my-param1=value my-param2=value2
vault kv put kv/VaultContext2 my-param3=value3 my-param4=value4
We have just created two secrets, one named VaultContext and the other named VaultContext2. Each secret will represent a
parameter group, and each key/value pair (e.g., my-param1=value) will represent a parameter in the respective groups.
Fetching the Parameters
Finally, we return to NiFi and click the Fetch Parameters button (down arrow):
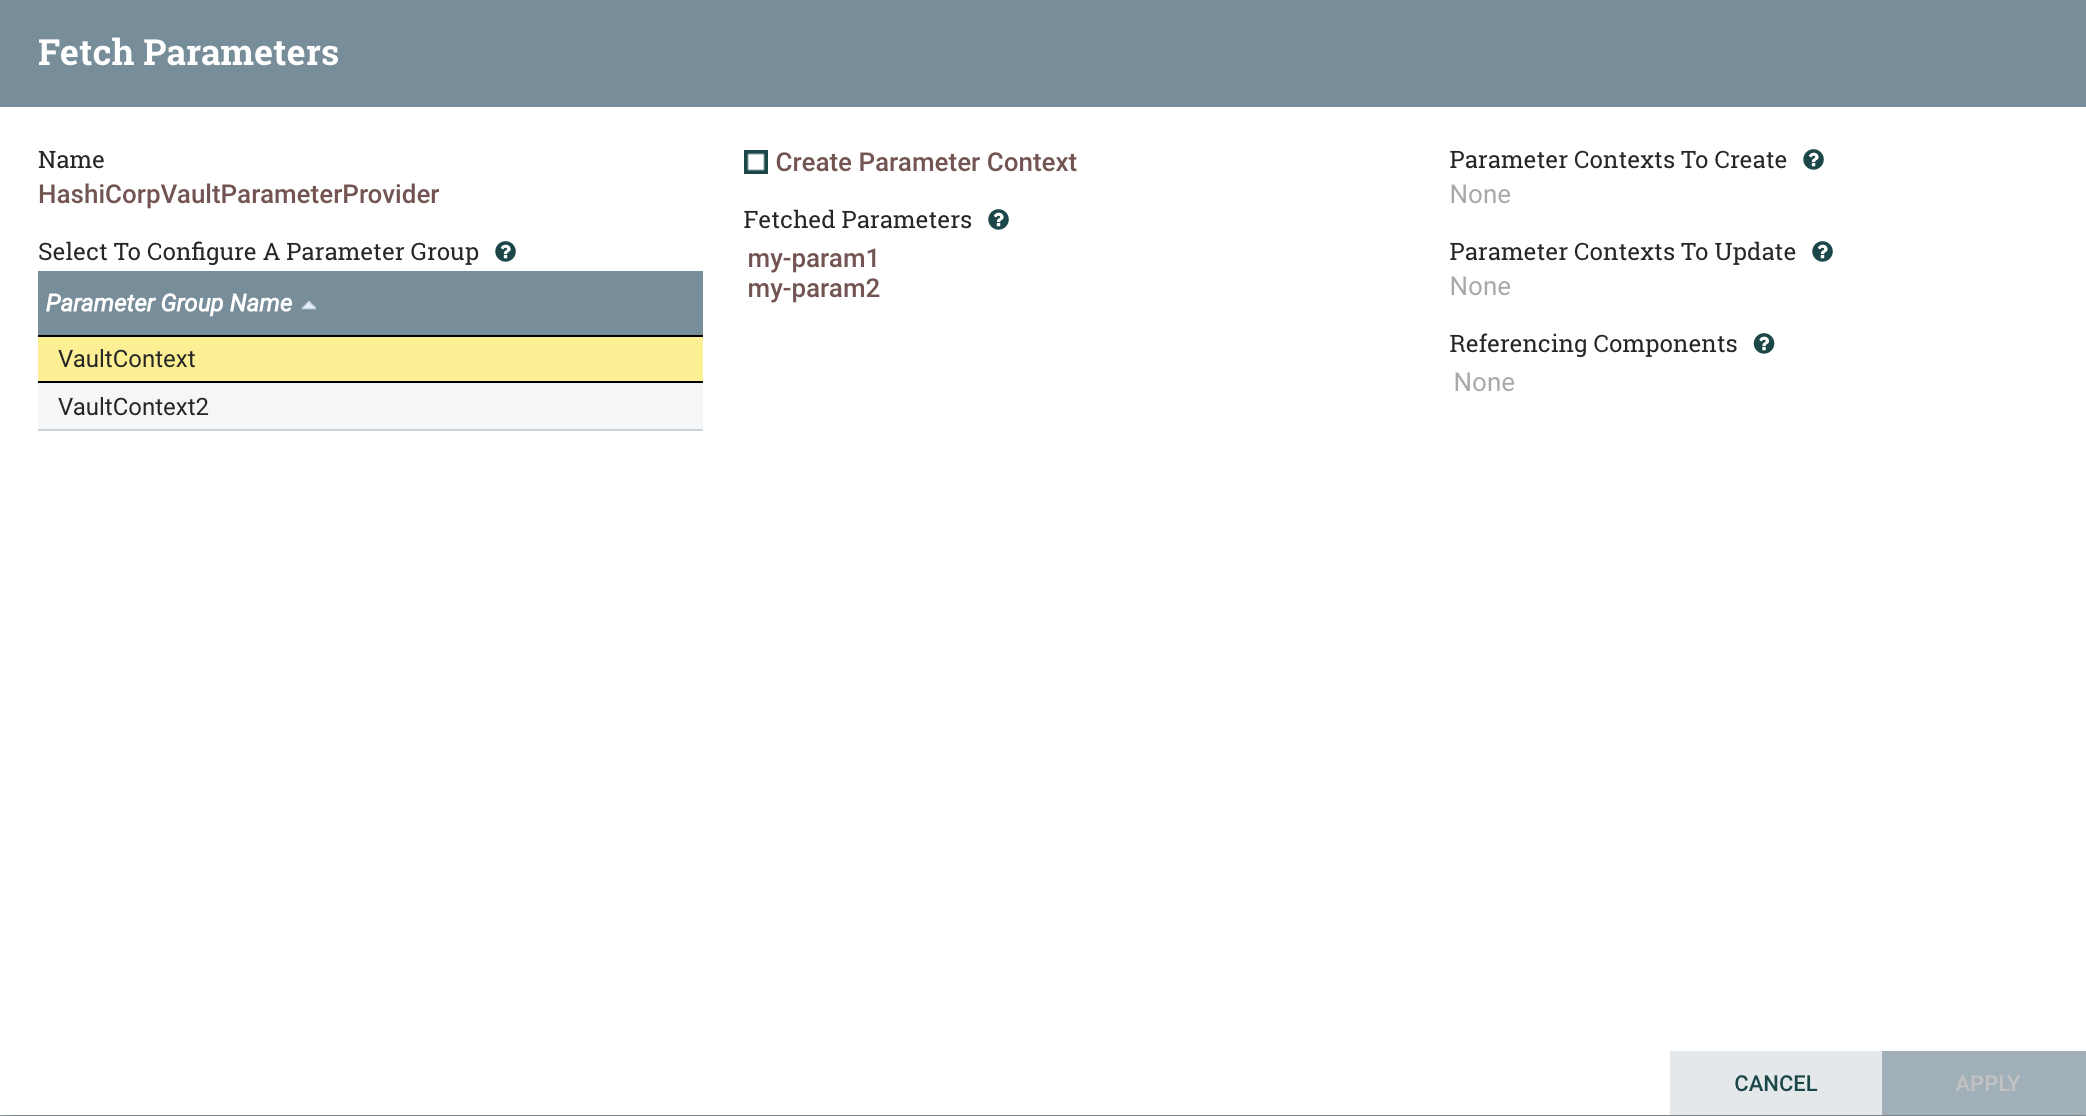
There are our two parameter groups, and since we start out with the first group selected, we see its two parameters. So far, we have just told NiFi to see what is available. In order to actually create a Parameter Context, we can check the ‘Create Parameter Context’ box. Do this for the ‘VaultContext’ group:
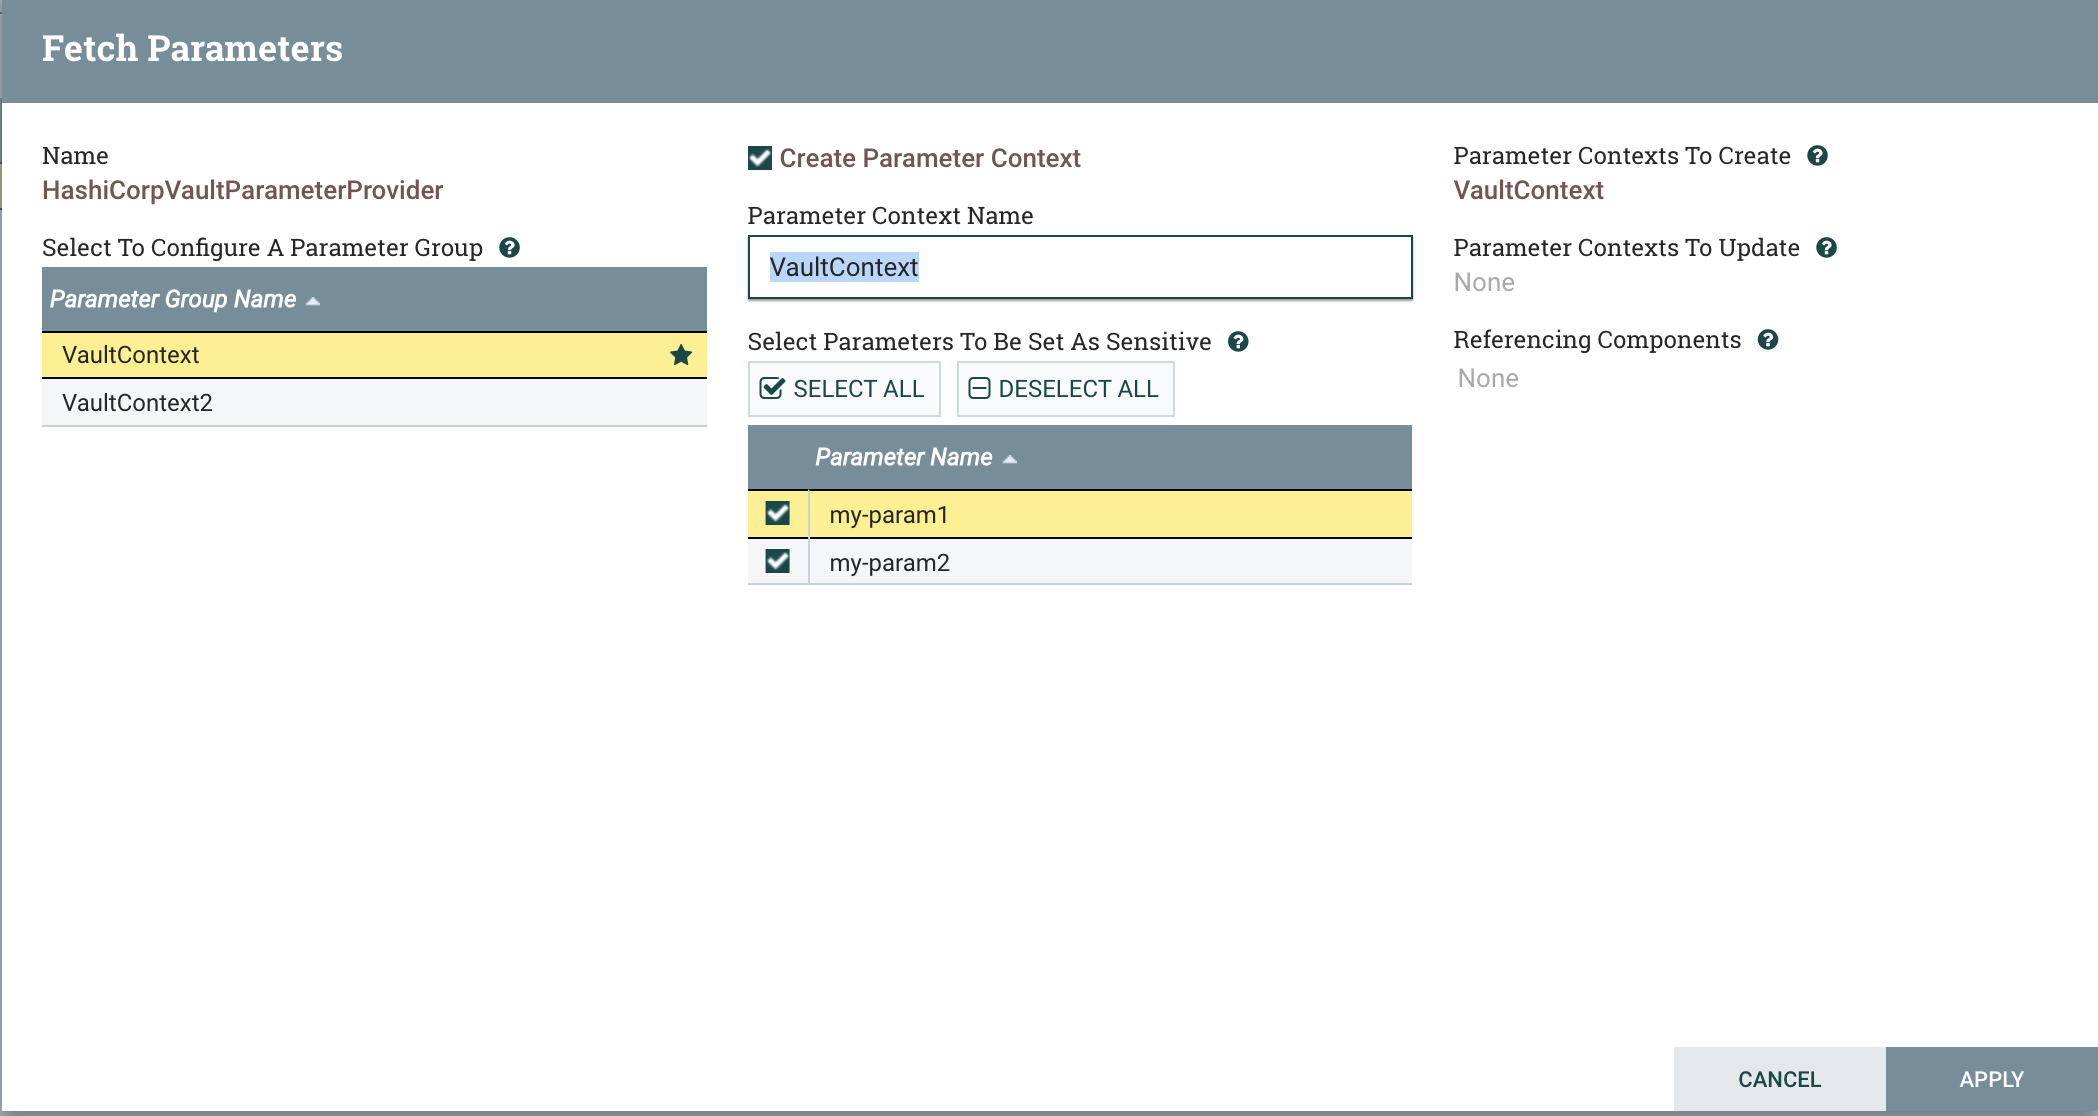
Now we can select whether each of these parameters is sensitive or not. Since we’re using HashiCorp Vault, let’s assume we want them both
to be sensitive, though this is not required. Here we could also change the name of the Parameter Context that we create, but we will leave it
as VaultContext, matching the secret name. Notice that the VaultContext group now has a star, indicating that it will have a Parameter Context
associated with it. We will not create a parameter context for VaultContext2, just to demonstrate that we can have groups available that
we choose not to map to Parameter Contexts. Click the ‘Apply’ button, and then Close.
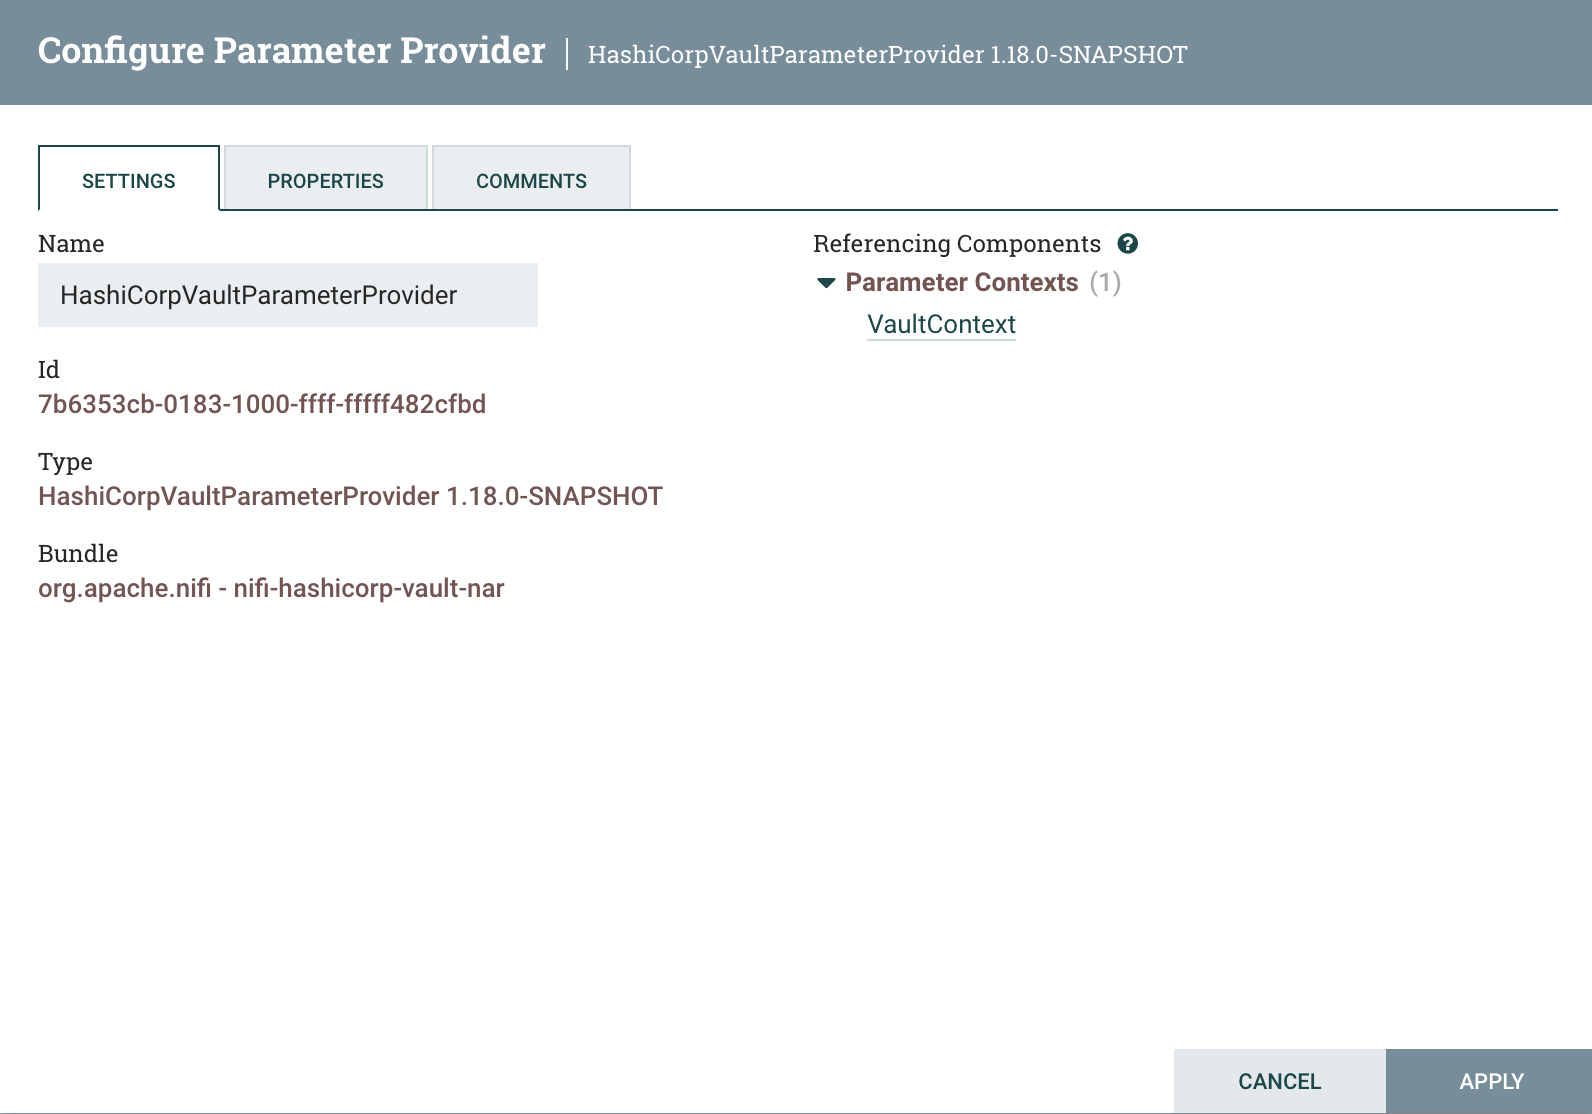
To view the new Parameter Context, Edit the provider again, and go to the ‘Settings’ tab, and we can see the new Parameter Context:
Click on its name, and then click the pencil icon to view its parameters:
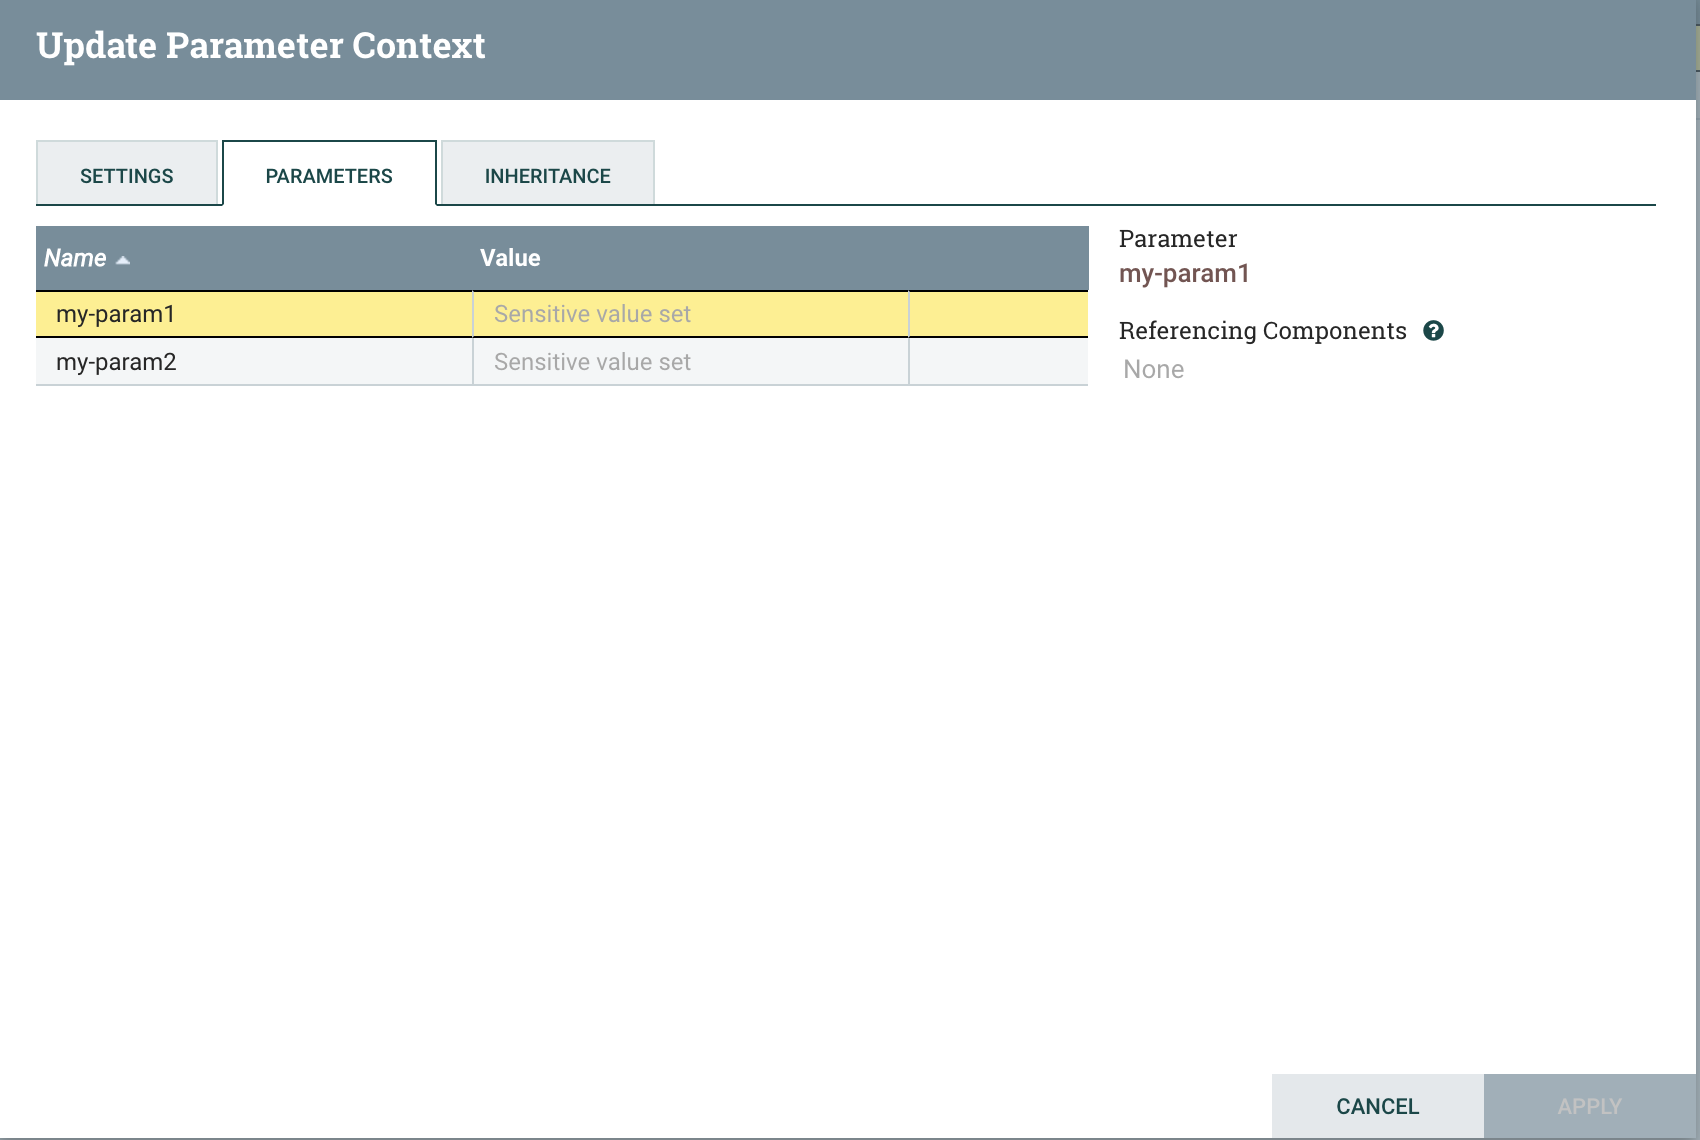
There are our parameters! Notice that we cannot edit them – only the parameter provider can do that now. If we update their values in Vault, or add or remove keys to these secrets, we have to Fetch Parameters again in order for NiFi to pick up the changes. Each time we add a new key, we must specify the sensitivity as we did before. Sensitivities can be changed, but only if the parameter is not actively referenced by a component in the flow.
For more information on the basics of Parameter Provider interaction, see this previous post.
Conclusion
Now we have seen how to create Parameter Contexts from HashiCorp Vault Key/Value secrets. Enjoy!
blog comments powered by Disqus